
When Armstrong introduced the “Brain” family of digital mixing valves, they introduced some much-needed improvements to domestic hot water systems around the world. Hospitals, universities, nursing homes, and many other institutions have seen the benefits of using these valves, as they help with legionella prevention, scald safety, reliability, and building automation.
The “Brain” mixing valves utilize integral temperature sensors to operate a stepper motor and spool valve. This operation results in a constant blended temperature output of +/- 2°F. Because the “Brain” can maintain the required outlet temperature with a large variation of inlet temperatures, it is possible to heat water past the Legionella kill temperature of 160°F and then safely blend it to a lower temperature that’s safe for sinks and showers.
Like any piece of mechanical equipment, the Brain valve must be periodically maintained. O-rings should be replaced every 6-12 months, depending on the service and water quality. Installation and maintenance guides for these valves are readily downloadable and provide step-by-step instructions on how to service these valves.
With experience comes knowledge. Having serviced these valves many times, we’d like to share with you some tips and recommendations that may not be in the installation guide.
TOOL RECOMMENDATIONS
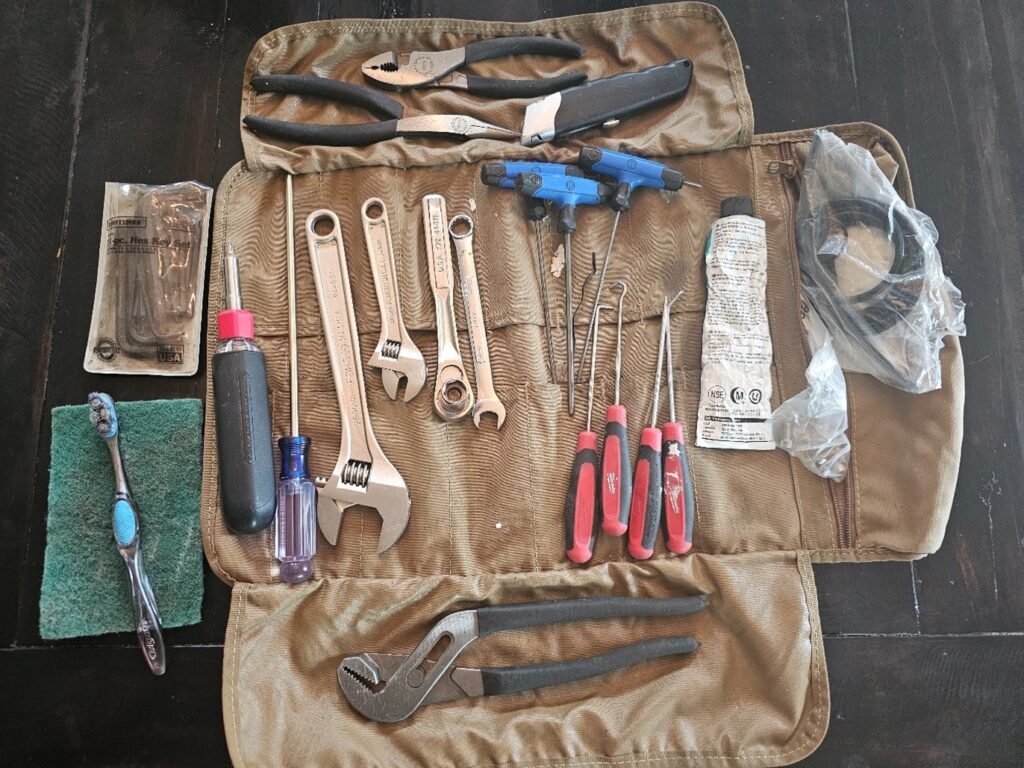
Our Sales Engineers have a small tool kit that they affectionately refer to as their “Brain Surgery Kit.” In it are all the tools recommended by Armstrong, along with some additional tools that they have found come in handy when working on a Brain Valve.
The Brain Valve can be fully disassembled and reassembled in line using 3 different sizes of hex wrenches (2.5mm, 3mm, & 4mm), a Phillips-head screwdriver, and a 13mm wrench. They’ve found that the following additional items can be very useful as well:
- Long Hex Wrenches
- Long Handled Screwdriver
- 13mm Socket
- Picks
- Lubricant
- Toothbrush & Scour Pad
- Extra Screws & O-Rings
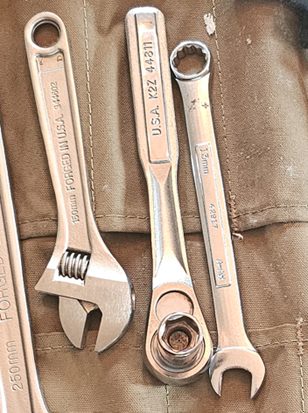
LONG HEX WRENCHES
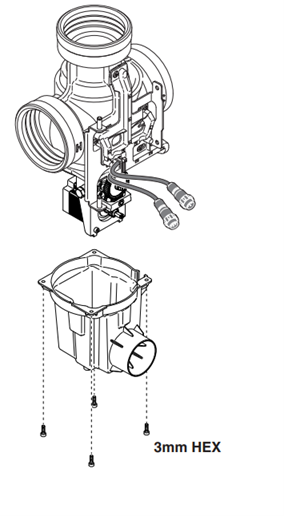
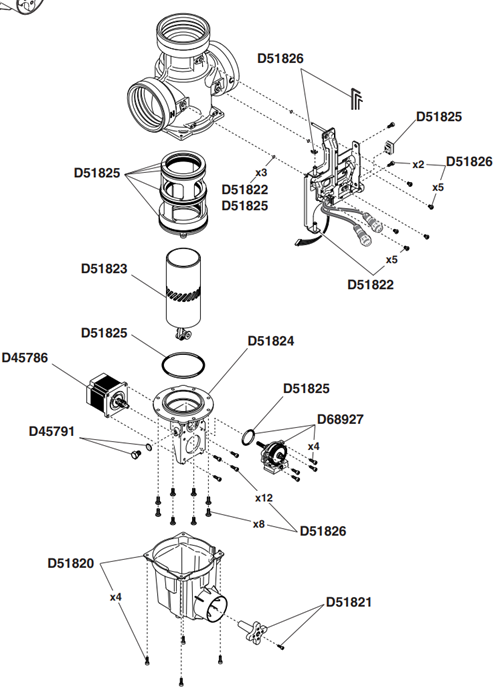 Each Brain valve is shipped with a set of hexagonal keys that can be used to disassemble the valve. Almost every fastener on the valve has a hex head that is either 2.5mm, 3mm, or 4mm. As you can see here, many of these hex-head screws come in from the bottom side of the valve. They are also located around other parts of the valve in some tight spots.
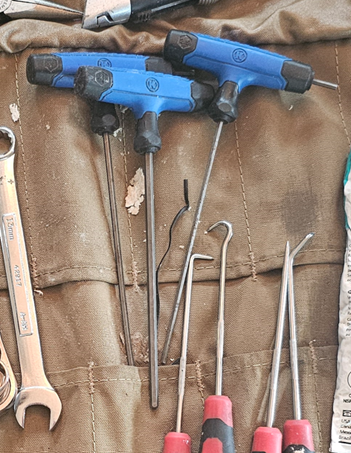 While you certainly can remove and replace these screws with the hex keys provided, you can save yourself a lot of time and some cramped hands by using long-handled hex wrenches like these from our “Brain Surgery Kit” bag.
LONG HANDLED SCREWDRIVER

On some of these valves, the 4 screws that hold the bottom housing on the valve have Phillips-heads on them, instead of hex-heads.
Just like the long hex wrenches, a long-handled screwdriver can give you much easier access to turn these screws, as the handle will extend past the bottom of the housing.
13mm SOCKET
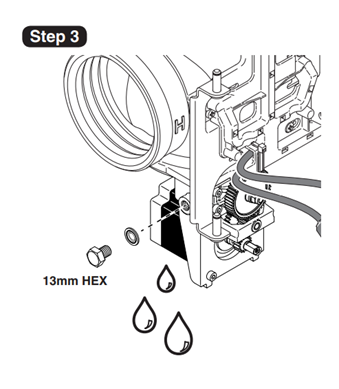 There is a 13mm drain plug in the lower part of the Brain valve. It is there to drain any water remaining in the brain after it has been isolated. This can be removed with a crescent wrench or a 13mm combination wrench. However, in the event that there is more water pressure than expected, that plug can be forced out by the water pressure during removal.
Using a socket to remove the plug guarantees that it will end up inside the socket, not somewhere on the floor (or even worse, down a floor drain).
PICKS
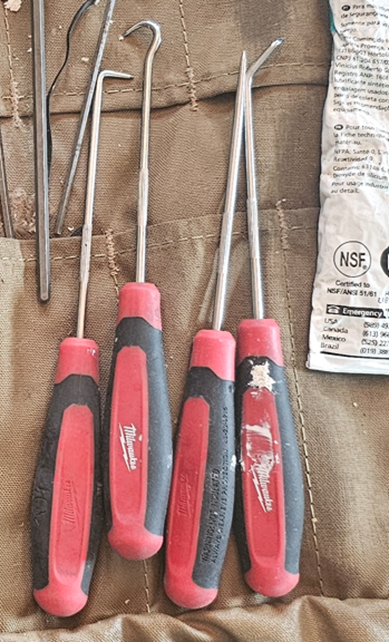
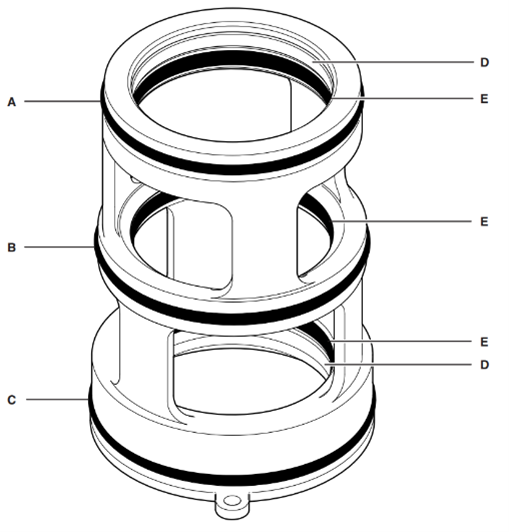
A good set of picks can be helpful in removing old O-Rings from the valve. In the current generation of Brain valves, all the O-Rings are located on a removable cartridge (shown below). In the 1st generation, they were all in the body of the valve itself, so the picks especially come in handy for those valves.
LUBRICANT
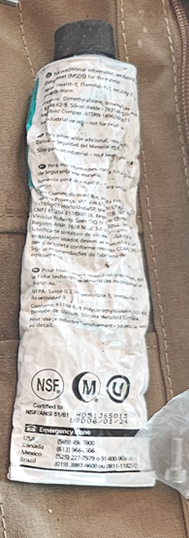
The O-rings in a Brain valve must be properly lubricated to ensure a long service life and easy reassembly. Be sure to use a food-grade, silicone based lubricant.
TOOTHBRUSH & SCOUR PAD
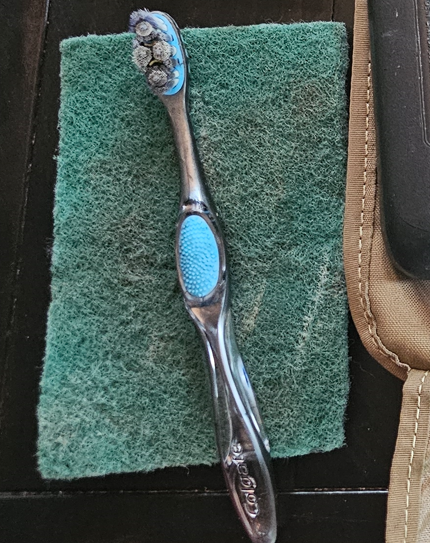
Even with a good softening system, internal components to a domestic water system can have buildup on them. I like to clean up the spool valve and cartridge assembly using a scour pad. The toothbrush comes in handy when cleaning out the O-ring grooves in the cartridge. If there is particulate, or pieces of old o-rings in the grooves, the new O-rings will not seat correctly, which will cause premature wear, and a shorter service life
EXTRA SCREWS & O-RINGS
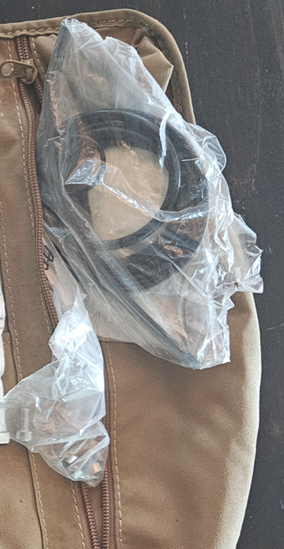
Stuff happens. Screws get dropped and lost O-rings break. Pieces go missing. We like to keep extra O-rings, seals, and screws from past jobs in our “Brain Surgery Kit” bag, because you never know when having just one extra part can keep your 1-hour job turn into a 2-day job.
COMMON MISTAKES
This is an opportunity to learn from the mistakes of others. Here are a couple of tips that have been learned the hard way:
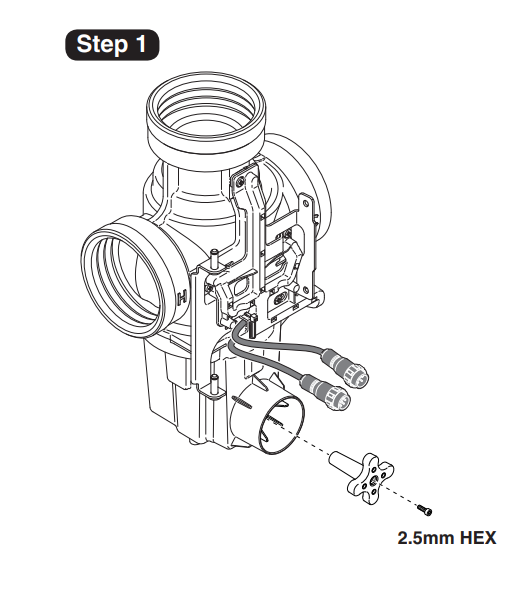
Don’t overtighten the rotor
There is a single 2.5mm hex screw that holds the magnetic rotor in place. That rotor needs to be able to rotate. It is the connection between the electronics module and the stepper motor that drives the spool valve up and down. Overtightening this component can keep it from turning. In the worst case scenario, overtightening of this screw will crack the plastic body of that rotor, and it will need to be replaced.
Don’t overtighten the screws on the bottom
There are four screws that hold the bottom enclosure on the valve. That enclosure is plastic, and can become brittle, due to being in a very hot environment. Overtightening of these screws can crack this enclosure.
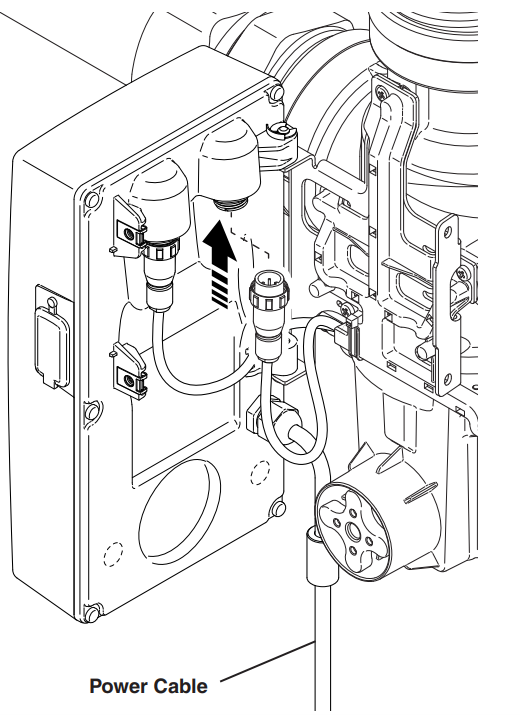
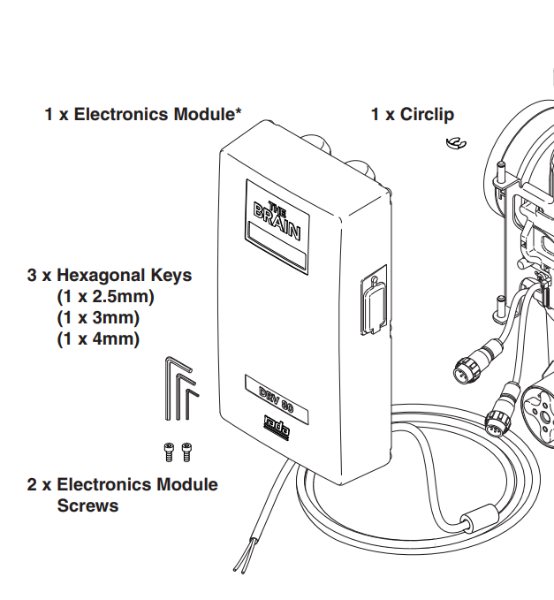
Close the electronics Module
On the side of the electronics module, there is a plastic stopper that give access to a serial port. This is where one can plug a laptop directly into the brain for programming and adjustment. If you utilize this port, be sure to close it tight after every time you use it. If water gets into the electronics module, it can fry the board, and the entire module will need to be replaced.
Hopefully, these tips will help ensure a long service life of your valves, and will save you time and effort in the future. Most importantly, when in doubt, call an expert at Campbell-Sevey. We’d be happy to come help you in person!
Additional resources for these valves can be found here: